What is Diecast Car Customization
Diecast car customization is the art of modifying or personalizing pre-made diecast model cars. This exciting hobby allows enthusiasts to transform mass-produced replicas into unique, one-of-a-kind creations. It involves various techniques, from simple paint jobs and decal applications to more complex modifications like engine swaps, interior detailing, and chassis alterations. Whether you’re a seasoned modeler or a complete beginner, customizing diecast cars offers a creative outlet and a chance to build a collection of miniature masterpieces. The possibilities are virtually limitless, allowing for complete creative freedom and a way to express your passion for cars.
Why Customize Your Diecast Car
There are numerous compelling reasons to customize your diecast cars. Firstly, it’s a fantastic way to express your individuality and creativity. You can bring your vision to life, whether you dream of recreating a specific real-life car, designing a fantasy vehicle, or simply experimenting with different paint schemes and styles. Customization also offers a rewarding sense of accomplishment. The process of transforming a basic model into something special is incredibly satisfying. Beyond personal satisfaction, customizing diecast cars can increase their value, especially if the work is professionally done or if the model represents a unique or rare creation. Finally, it is an excellent way to connect with a community of like-minded enthusiasts, sharing ideas, tips, and showing off your custom creations. Customize your diecast cars for a hobby that is fun and also a chance to create a personal collection.
Gathering Your Customization Supplies

Before you start, gather the necessary supplies. A well-equipped workspace is essential for a smooth and enjoyable experience. This includes a well-lit area with good ventilation to minimize exposure to fumes from paints and solvents. Make sure to get a cutting mat to protect your workspace, along with disposable gloves, and a dust mask to protect yourself. Also, you will need various tools, paints, and other materials which will be discussed in the coming sections. The more prepared you are, the easier the process will become and the better your final product will be. Consider a dedicated storage system to keep your tools and materials organized. Proper preparation is the key to successful diecast car customization.
Essential Tools for Diecast Car Customization
Several essential tools are needed to start customizing diecast cars. A precision screwdriver set is crucial for disassembling and reassembling the models. You’ll need a hobby knife or X-Acto knife for trimming, cutting decals, and other detail work. Tweezers are invaluable for handling small parts and decals. Paintbrushes of various sizes, from fine-tipped for details to wider brushes for larger surfaces, are necessary. You will also need an airbrush or spray cans for applying paint evenly. A sanding block with different grit sandpaper is essential for preparing surfaces. Finally, a cutting mat protects your workspace while providing a non-slip surface. A small parts tray or organizer will prevent you from losing small pieces. Invest in quality tools for lasting results.
Types of Paints and Finishes
Choosing the right paint and finish is crucial for achieving the desired look for your custom diecast car. Acrylic paints are popular due to their ease of use, quick drying time, and low odor. Enamel paints provide a durable finish but require longer drying times and can have a stronger odor. Lacquer paints are known for their high gloss and smooth finish but require more care when applying. When it comes to finishes, consider gloss for a shiny, showroom look, satin for a subtle sheen, and matte for a flat, non-reflective appearance. Always prime the surface before applying paint to ensure proper adhesion. Use clear coats to protect the paint job and enhance the finish, such as applying a gloss clear coat over a base coat to give the car a shiny look.
Disassembling Your Diecast Car

Disassembling your diecast car is a critical step in the customization process. Start by carefully examining the model to identify all screws, clips, and other fasteners. Use a precision screwdriver set to remove the screws, taking care not to strip them. Some models may have hidden clips that need to be gently pried open using a hobby knife or small plastic tool. Take photos or make notes as you disassemble the car to remember how the parts fit together. Separate the body, chassis, interior, and other components, and store them in a safe place to prevent loss or damage. Be patient, as some models are more complex than others, and the goal is to take the car apart without breaking any pieces. A well-disassembled car is ready for the next steps.
Removing the Original Paint
Removing the original paint is crucial for a clean and professional-looking finish. There are several methods you can use, including chemical strippers, which are very effective, but require careful handling and good ventilation. Alternatively, you can use a manual method, such as sanding. If you’re sanding, start with coarse grit sandpaper and gradually move to finer grits to avoid damaging the metal. For chemical stripping, apply the stripper according to the manufacturer’s instructions, then use a soft brush or tool to remove the softened paint. After removing the paint, thoroughly clean the body with soap and water to remove any residue. Make sure the surface is perfectly clean and free of any contaminants before proceeding to the next step, which is preparing the surface for painting.
Preparing the Surface for Painting
Proper surface preparation is essential for a flawless paint job. Once you’ve removed the old paint, inspect the surface for any imperfections, such as scratches, dents, or casting flaws. Use fine-grit sandpaper or a sanding block to smooth out any imperfections. Fill any holes or defects with a suitable filler, such as body filler or primer, then sand it smooth once dry. Clean the surface with a degreaser or wax and grease remover to remove any remaining oils or contaminants. Applying a primer is a must, as it will create a smooth, even surface for the paint to adhere to. Choose a primer that is compatible with the type of paint you plan to use. Finally, after priming, lightly sand the surface again to ensure an ultra-smooth finish. Proper surface preparation makes a big difference.
Painting Your Diecast Car

Painting your diecast car is where your vision starts to come to life. If using spray cans, hold the can about 6-8 inches from the surface and apply thin, even coats, allowing each coat to dry before applying the next. For airbrushing, thin the paint according to the manufacturer’s instructions and experiment with the air pressure to achieve the desired result. Apply multiple thin coats, rather than a single thick coat, to avoid runs and drips. When painting, work in a dust-free environment and wear a mask to protect yourself from paint fumes. Let the paint dry completely before moving on to the next steps. Patience and attention to detail are the keys to a professional paint job. Good painting can take your customizing to the next level.
Applying Primer Coats
Before you start painting your diecast car, you’ll need to apply a primer. Primer is a base coat that creates a smooth surface for the paint to adhere to. It also helps the paint last longer and protects the metal from corrosion. Apply the primer in thin, even coats. If you’re using spray cans, hold the can about 6-8 inches away from the surface and apply light, even coats, allowing each coat to dry before applying the next. For airbrushing, thin the primer according to the manufacturer’s instructions and experiment with the air pressure to achieve a smooth finish. Allow the primer to cure completely before sanding it lightly with fine-grit sandpaper. Priming the car is a must to get a great result.
Applying Base Coats
After the primer is fully dry and lightly sanded, you can apply the base coats of your chosen color. Apply thin, even coats, allowing each coat to dry before applying the next. Multiple thin coats are always better than a single thick coat to avoid runs and drips. Use a consistent spraying pattern and overlap each pass slightly. Pay close attention to the edges and corners of the model to ensure complete coverage. If you are changing colors, it might be best to do several coats. Depending on the color, you might need to apply several coats to achieve full opacity. Once the base coats are dry, let the paint cure completely according to the manufacturer’s instructions. This step sets the foundation for your custom paint job, so take your time and be careful with your application.
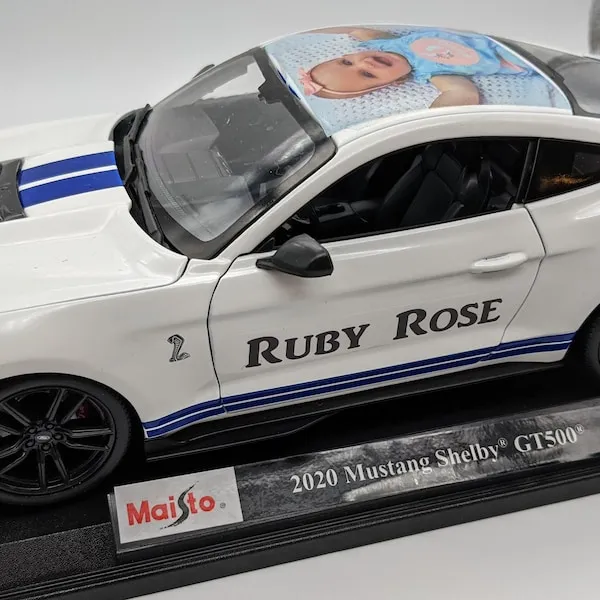
Adding Detail with Decals and Stickers
Decals and stickers add the finishing touches to your custom diecast car, bringing it to life with realistic details and personalized flair. Carefully cut out the decals from the sheet, using a hobby knife or scissors. Soak the decals in warm water for a few seconds, allowing the adhesive to activate. Gently slide the decal off the backing paper and position it on the model. Use a soft cloth or cotton swab to remove any air bubbles and smooth the decal onto the surface. For complex decals, use decal setting solutions to help them conform to curved surfaces. After the decals have dried, you can apply a clear coat to protect them and give the model a professional finish. Adding decals, logos, and racing stripes will really make your diecast car pop!
Reassembling and Finishing Touches
Reassembling your diecast car requires careful attention to detail. Refer to your photos or notes taken during disassembly to ensure you put everything back in the right place. Start by reattaching the interior, chassis, and other components. Secure all screws and clips, making sure everything is properly aligned. Once the model is reassembled, inspect it carefully for any loose parts or imperfections. Apply a clear coat to protect the paint and decals, and give the model a polished finish. Allow the clear coat to dry completely before handling the model. This step is the final opportunity to make any needed adjustments. A properly reassembled model shows how much you have put into the customization process.
Tips for a Professional Finish
Achieving a professional-looking finish requires patience, attention to detail, and a few essential tips. Always work in a clean, well-lit, and dust-free environment. Practice your painting techniques on a test piece before applying paint to the model. Apply thin, even coats, and avoid runs and drips. Use high-quality paints, primers, and clear coats. Invest in good tools and equipment. Take your time and don’t rush the process. Be patient and don’t be afraid to make mistakes. Research the specific techniques and methods used by experienced modelers. Regularly clean and maintain your tools to ensure they are in good working order. By following these tips, you can achieve stunning results and create custom diecast cars that are a true work of art.
Protecting Your Custom Diecast Car

Protecting your custom diecast car is essential to preserve its appearance and value. Display your models in a dust-free environment, such as a glass cabinet or display case. Avoid exposing your models to direct sunlight, which can cause the paint to fade. Handle your models with clean hands to avoid transferring oils and dirt. Consider applying a UV-resistant clear coat to protect the paint from fading. Regularly dust your models with a soft brush or cloth. If you plan to transport your models, use a padded container to prevent damage. Following these simple steps will help protect your custom diecast cars and keep them looking their best for years to come.
Where to Find Inspiration
Finding inspiration is the first step in creating a unique custom diecast car. Explore various sources, such as online forums, social media groups dedicated to diecast car customization, and websites. Look at real-life car designs, racing liveries, and custom car builds for ideas. Study the work of other modelers to learn new techniques and find inspiration for your own projects. Visit car shows and museums to see real-life vehicles up close. Consider your personal interests, hobbies, and favorite cars to inspire your designs. Don’t be afraid to experiment with different ideas and try new things. The more you expose yourself to various sources of inspiration, the more creative your custom diecast cars will become.
Common Customization Mistakes to Avoid
Avoid these common mistakes to ensure a successful customization project. Don’t rush the process; patience is key to a professional finish. Failing to properly prepare the surface by not removing the original paint, priming, or sanding. Applying too much paint at once, which can lead to runs and drips. Not using the right tools or using them improperly. Skipping the clear coat, which protects the paint and decals. Not wearing proper safety equipment, such as a mask and gloves, when using paints and chemicals. Neglecting to clean the work area and tools. Ignoring the manufacturer’s instructions for paints and other materials. Remember that learning from your mistakes is a part of the process. With practice and experience, you’ll learn to avoid these mistakes and create amazing custom diecast cars.