Understanding Diecast Airplanes & Cleaning Needs
Diecast airplanes are more than just toys; they’re intricate collectibles and prized possessions for many enthusiasts. Crafted with meticulous detail, these miniature aircraft often feature realistic paint schemes, accurate markings, and finely molded parts. The value of these models can range from a few dollars to several hundred, making their care and maintenance crucial for preserving their beauty and value. Regular cleaning not only keeps these models looking their best but also protects them from the damaging effects of dust, dirt, and environmental pollutants. Understanding the materials and finishes used in diecast airplane construction is key to adopting the right cleaning approach.
What are Diecast Airplanes?
Diecast airplanes are miniature replicas of real-world aircraft, manufactured using a die-casting process, typically involving zinc alloy or other metals. This method allows for highly detailed and accurate reproductions of the original aircraft. These models often come in various scales, such as 1:72, 1:200, or 1:400, catering to different collectors and display preferences. The level of detail can vary, but high-quality diecast models often feature finely molded parts, realistic paint schemes, and authentic markings, making them sought-after items for aviation enthusiasts and collectors around the globe. They can represent anything from commercial airliners to historic military planes and are often a focal point of a dedicated collection or a beautiful addition to an office.
Why Cleaning is Important

Cleaning diecast airplanes is a critical aspect of their upkeep, significantly influencing their longevity and preservation of value. Dust and dirt, if left unattended, can accumulate on the surface and in crevices, potentially scratching the delicate paint and marring the intricate details of the models. Furthermore, exposure to environmental pollutants and oils from handling can cause corrosion or discoloration over time, reducing both the aesthetic appeal and the monetary worth of these collectibles. Routine cleaning prevents the build-up of these harmful substances, maintaining the pristine condition of the airplanes. This preventative approach ensures the models remain in excellent condition for future enjoyment and, if desired, resale or inheritance. Regular care underscores the value of your collection.
Common Materials and Finishes
Diecast airplanes are typically constructed from die-cast metal alloys, primarily zinc alloys, which are known for their durability and ability to capture fine details. These alloys are often coated with paint, lacquers, or other protective finishes to achieve a realistic appearance and protect against corrosion. The paint itself can vary, ranging from enamel to acrylic, each with its own characteristics regarding durability and cleaning requirements. Some models might also include plastic components, such as propellers or landing gear, which may have different cleaning needs. Recognizing the diverse materials and finishes of your diecast models allows you to select the most appropriate cleaning solutions and methods, ensuring you avoid damage and preserve the integrity of the airplane’s surface and features.
Gathering Your Cleaning Supplies
Having the right tools and materials is crucial before starting the cleaning process of your diecast airplane collection. These items will help to remove dirt and dust effectively without causing harm to your valuable models. Careful selection and use of supplies, such as soft cloths, brushes, and appropriate cleaning solutions, will help to keep your diecast airplanes in pristine condition. This preparation reduces the risk of scratches and ensures the cleaning process is gentle and effective.
The Right Cleaning Solutions

Selecting the right cleaning solutions is crucial to protect your diecast airplanes from damage. Avoid harsh chemicals, solvents, and abrasive cleaners that can strip the paint, damage decals, or cause discoloration. Mild soap solutions, specifically designed for delicate surfaces, are often a safe choice. Distilled water is also important as it prevents mineral deposits that can leave unsightly marks. For more stubborn grime, isopropyl alcohol (rubbing alcohol) diluted with water can be used carefully, but always test it on a small, inconspicuous area first. Avoid any solutions that contain bleach or ammonia, as they can corrode the metal or damage the finish. Read labels carefully.
Soft Cloths and Brushes
Choosing the right tools for physical cleaning is essential for safely cleaning diecast airplanes. Soft microfiber cloths are ideal because they are gentle, non-abrasive, and excellent at trapping dust and dirt particles. These cloths minimize the risk of scratches on the painted surfaces of the model. For detailed cleaning of crevices and hard-to-reach areas, a soft-bristled brush, such as a make-up brush or a fine-tipped paintbrush, is useful. Avoid using brushes with stiff bristles, as they could potentially scratch or damage the intricate details of the airplanes. Always inspect your cloths and brushes for any debris before use, ensuring that your equipment is clean to avoid any accidental abrasion to your model.
Other Essential Tools
Besides cleaning solutions, soft cloths, and brushes, several other tools can greatly aid in the cleaning process. A can of compressed air is invaluable for removing dust from tight spots and intricate details where cloths and brushes can’t reach. Cotton swabs, or Q-tips, are excellent for cleaning small crevices and removing stubborn stains. A magnifying glass can be useful to examine the models closely and identify any areas that need special attention. Additionally, a small container or tray to hold your cleaning solution and a clean workspace will make the cleaning process more organized and efficient. These tools help enhance the safety and effectiveness of the cleaning process.
Step-by-Step Cleaning Instructions

Following a systematic cleaning approach will ensure your diecast airplanes stay in top condition. It starts with gentle dusting and progresses to a more detailed washing process. The steps are designed to be simple, ensuring your models remain safe and beautifully preserved. This detailed process is a guide to help you with the care and maintenance of your diecast collection.
Dusting Your Diecast Airplane
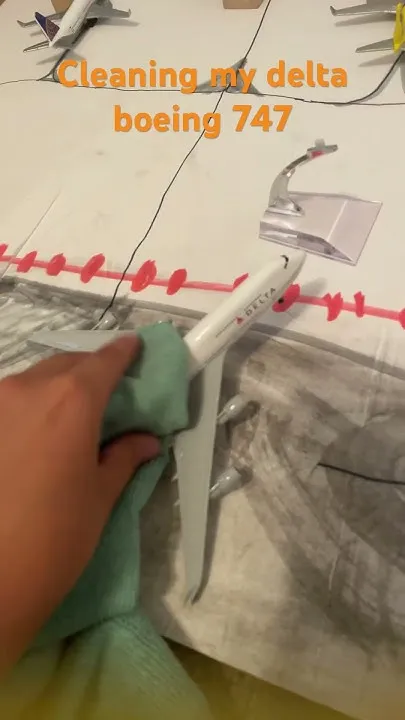
Begin by gently dusting the surface of your diecast airplane. Use a soft microfiber cloth or a soft-bristled brush to carefully remove loose dust and debris. Avoid applying too much pressure, which could scratch the paint or dislodge delicate parts. For areas that are hard to reach, such as around the wings and tail, use a can of compressed air to blow away dust. Inspect your aircraft closely after dusting to make sure that all the dust has been removed. This initial step is crucial as it removes surface particles before you proceed with any wet cleaning methods.
Gentle Washing Techniques
If your diecast airplane requires more than a simple dusting, a gentle washing technique is recommended. First, dip a microfiber cloth in a solution of mild soap and distilled water. Wring out the cloth thoroughly to remove excess water, preventing water spots. Gently wipe down the airplane’s surface, working in small sections. Avoid getting water into the cockpit or other sensitive areas. Rinse the cloth frequently and re-dip in the cleaning solution to prevent the spread of dirt. When finished, use a clean, dry microfiber cloth to remove any remaining moisture and to prevent watermarks. Be gentle and patient.
Cleaning Hard-to-Reach Areas

Cleaning hard-to-reach areas requires a more careful approach. Use a soft-bristled brush, a cotton swab, or a toothpick to access tight spaces like the gaps between the wings and fuselage, around the engines, and in the landing gear. Dip the brush or cotton swab in a mild cleaning solution and gently scrub away any accumulated dirt or grime. For particularly stubborn areas, you may need to use a slightly moistened cotton swab, but be cautious not to saturate the area. Always dry these areas thoroughly after cleaning to prevent any moisture buildup that could lead to corrosion or damage.
Dealing with Stubborn Stains
Dealing with stubborn stains requires patience and the right approach. For minor stains, try gently wiping the area with a cotton swab dipped in a mild cleaning solution, testing a small, inconspicuous area first to ensure that it does not damage the paint. For more resistant stains, consider using a diluted solution of isopropyl alcohol on a cotton swab, but proceed with extreme caution and avoid scrubbing. Avoid abrasive cleaners, as they can permanently damage the finish. Always rinse the cleaned area with distilled water and dry it immediately to prevent any residue. Patience and care are key to removing stains without damaging your diecast airplane.
Detailed Cleaning Process
This step-by-step guide will help you in the detailed cleaning of your diecast airplane. From the body and wings to the intricate details and the stand, follow each step to ensure your model aircraft looks its best. It is a comprehensive approach for the ultimate care and maintenance.
Cleaning the Body & Wings

Carefully clean the body and wings of your diecast airplane with a soft microfiber cloth. Dip the cloth in a mild cleaning solution and gently wipe down the surfaces. Work in small sections, and avoid applying too much pressure. Pay special attention to areas where dust and dirt may accumulate, such as the leading edges of the wings and the fuselage. Rinse the cloth frequently and re-dip in the cleaning solution. After wiping down the entire body and wings, use a clean, dry microfiber cloth to remove any remaining moisture, polishing the surfaces gently.
Cleaning the Details
Cleaning the details of your diecast airplane requires precision. Use a soft-bristled brush or cotton swab to clean small parts such as the engines, propellers, and landing gear. Dip the brush or swab in a mild cleaning solution and gently remove any dirt or grime. Avoid applying too much liquid. For detailed paintwork and markings, use a cotton swab barely moistened with distilled water to carefully clean any imperfections. After cleaning the details, use a dry cotton swab or a dry brush to remove any remaining moisture. The level of detail in these models makes this step crucial.
Cleaning the Stand & Base
The stand or base often accumulates dust and dirt, requiring careful attention during the cleaning process. If the stand is plastic or metal, wipe it down with a soft, damp cloth and a mild cleaning solution. For wooden bases, avoid excess moisture, and use a slightly damp cloth. Ensure that all parts are completely dry to avoid any water damage. Inspect the stand regularly and clean it when necessary to prevent buildup. Cleaning the stand will help make your airplane display look its best.
Drying and Protecting Your Airplane

After cleaning your diecast airplane, drying it properly is crucial. This step ensures your model remains in pristine condition. It also protects the airplane from potential damage caused by moisture. Proper drying techniques, followed by protective measures, guarantee the longevity of your models. This phase of care is simple but very important.
Proper Drying Methods
After cleaning, drying your diecast airplane is essential to prevent water spots, streaks, and potential corrosion. Use a clean, soft microfiber cloth to gently pat the entire model dry, paying attention to crevices and hard-to-reach areas. Avoid air-drying, as this may lead to watermarks, and instead, ensure that the entire surface is completely dry. For detailed areas, you can use a cotton swab to absorb any remaining moisture. Once the model is dry, inspect it under good lighting to ensure that no water residue remains.
Protecting Your Diecast Airplane
Once your diecast airplane is clean and dry, protecting it is a key step. The best method is to store your model in a case that minimizes exposure to dust, sunlight, and temperature fluctuations. Consider using UV-protective display cases to protect your models from sun damage, as prolonged exposure to sunlight can cause fading and discoloration. Avoid placing your models in areas where they can be easily knocked over. Regular inspections and routine cleaning are essential for the long-term preservation of your collection, allowing you to enjoy them for years to come.
Storage and Display Tips
Proper storage and display are essential for preserving your diecast airplane collection. The environment where you store and exhibit your models can significantly impact their condition over time. Using these methods helps ensure that your collection stays protected and showcases your airplanes in the best possible light. Effective storage practices will protect your investment.
Where to Store Your Collection
Choosing the right storage location for your diecast airplane collection is essential for long-term preservation. Opt for a cool, dry place away from direct sunlight, which can cause the paint to fade and degrade the models. A display cabinet or enclosed shelves offer the best protection against dust and accidental damage. If you don’t have display cabinets, consider storing them in their original boxes, if available, as these can help protect the models. Avoid storing your collection in attics, basements, or areas with high humidity, which can promote corrosion. A stable, controlled environment is best for your collection.
Displaying Your Airplanes Safely
When displaying your diecast airplanes, focus on safety. Use display cases or shelves to protect them from dust and accidental bumps. Ensure that the cases are stable and securely placed to avoid the risk of falling. If you have open shelves, consider using non-slip mats to prevent the models from sliding. Arrange the airplanes in a way that minimizes overcrowding, allowing you to appreciate each model individually. Avoid placing them near windows or in areas where they are directly exposed to sunlight. Rotating your collection periodically can prevent the models from prolonged exposure to light, ensuring they remain in excellent condition.
Common Mistakes to Avoid
Avoiding common mistakes is as important as knowing the correct cleaning methods. This section highlights potential pitfalls that can damage your diecast airplanes. By being aware of these errors, you can protect your collection and prevent unintended damage, preserving the value and beauty of your models. Learning from common errors will help maintain your models.
Using the Wrong Cleaning Products
One of the most significant mistakes is using inappropriate cleaning products. Harsh chemicals, solvents, and abrasive cleaners can strip the paint, damage decals, or corrode the metal. Always avoid using household cleaners that contain bleach, ammonia, or strong solvents. Stick to gentle, pH-neutral soaps or specialized cleaners designed for delicate surfaces. Testing any new cleaning solution on a small, inconspicuous area first can prevent irreversible damage. Carefully reading the product labels and understanding the specific cleaning needs of your models is crucial to avoiding this common mistake.
Applying Too Much Pressure
Applying excessive pressure during cleaning is another common mistake that can lead to irreversible damage. Vigorous scrubbing can scratch the paint or dislodge delicate details, especially on older or more fragile models. Always use gentle strokes, and let the cleaning solution do the work. For particularly stubborn grime, allow the cleaning solution to soak for a short time before gently wiping. Patience and a soft touch are essential to protect the surface of your models. Avoid aggressive cleaning techniques and adopt a more delicate approach.
Ignoring Specific Material Instructions
Ignoring specific material instructions can result in damaging your diecast airplanes. Some models may have special finishes or delicate details that require unique care. For instance, certain materials may be sensitive to particular cleaning agents. Always research and understand the materials used in your models. If you have any doubts, it is best to test the cleaning solution on a less visible part before proceeding. Consulting the manufacturer’s guidelines, if available, can provide valuable insights into the proper care of your specific models. Ignoring this can lead to damaging your models.