What is Diecast Metal
Diecast metal is a manufacturing process where molten metal is forced into a mold under high pressure. This technique is commonly used to create complex shapes with high precision. The resulting products, often called die castings, are found in a wide range of applications, from automotive components to toys and household items. The term ‘diecast’ refers not only to the process but also to the materials used, which are typically non-ferrous metals like zinc, aluminum, magnesium, copper, and lead-based alloys. These metals are chosen for their ability to be cast easily, their strength-to-weight ratio, and their ability to take on intricate details. Knowing the properties of diecast metal is essential before attempting to solder it, as it influences the techniques and materials required to achieve a successful bond.
Understanding Diecast Metals Composition and Properties
The composition of diecast metal varies depending on the intended application, but common elements include zinc, aluminum, and other alloys. Aluminum diecast parts, for example, are known for their lightweight properties and resistance to corrosion, making them suitable for automotive and aerospace industries. Zinc-based diecast components often appear in hardware and toys due to their ability to be cast into intricate shapes. These metals’ low melting points and excellent castability make them ideal for diecasting. The surface of diecast metal can also present challenges for soldering. The presence of oxides, oils, or coatings can hinder solder’s ability to adhere correctly. In addition, some diecast alloys might have impurities that can lead to weak solder joints or corrosion over time. A thorough understanding of the specific alloy involved is critical for successful soldering. Consider the thermal conductivity of the metal, which impacts how quickly heat transfers away from the soldering area, as a factor that impacts the soldering procedure.
Why is Soldering Diecast Challenging

Soldering diecast metal can present several challenges that stem from the material’s composition and properties. One major challenge is the presence of oxides on the metal surface, which can impede solder’s ability to form a strong bond. These oxides form naturally as the metal reacts with the air, acting as a barrier. Another factor is the potential for diecast metals to have a relatively low melting point compared to solders. This makes it easy to overheat the metal, leading to melting or warping. Additionally, the composition of some diecast alloys can contain impurities that interfere with solder adhesion, resulting in weak or unreliable joints. Proper surface preparation, careful temperature control, and the correct choice of solder and flux are crucial to overcoming these obstacles. A careful understanding of the challenges and the application of the correct methods will significantly increase the chances of a successful solder joint.
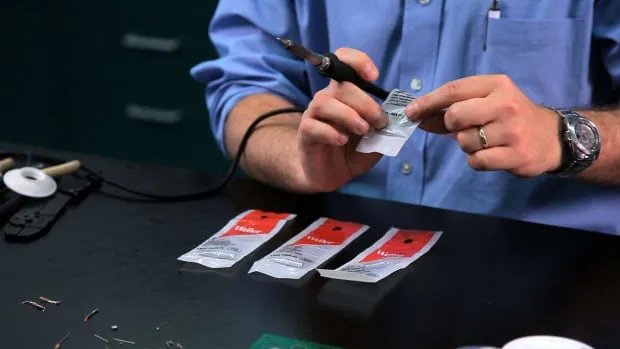
Equipment You’ll Need to Solder Diecast
To successfully solder diecast metal, you’ll need specific equipment designed for the task. A temperature-controlled soldering iron is essential to provide precise heat without overheating the diecast. Solder with a lower melting point, often tin-based alloys, is preferred to prevent melting the diecast. A good-quality flux is necessary to clean the metal surface and promote solder adhesion. Other helpful tools include a solder stand to hold the iron safely, a wire brush or abrasive pad for cleaning the metal, and a damp sponge or cloth for cleaning the soldering iron tip. Work in a well-ventilated area to avoid inhaling fumes, which requires safety glasses to protect your eyes. With these items in place, the soldering process can start efficiently and securely. Make sure to have all of the equipment ready and easily accessible before starting.
Choosing the Right Solder for Diecast
Selecting the appropriate solder is crucial for successful diecast soldering. Because diecast metals often have relatively low melting points, using a solder with a lower melting point is essential. This helps to prevent the base metal from melting or warping during the soldering process. Tin-based solders, such as those containing tin and lead or tin and silver alloys, are often recommended. These solders provide a good balance of melting temperature, strength, and ease of use. Avoid solders with high melting points, as they can damage or melt the diecast material. The diameter of the solder also matters. Use a diameter that is appropriate for the size and complexity of the diecast part. Thinner solders are ideal for detailed work, while thicker solders work well for larger joints. Always refer to the solder’s specifications to ensure its compatibility with the diecast alloy you’re working with. Proper selection will guarantee the solder joints’ durability and reliability.
Selecting a Suitable Soldering Iron

A temperature-controlled soldering iron is highly recommended for diecast soldering. These irons allow you to set and maintain a specific temperature, preventing overheating and damage to the diecast metal. Look for an iron with a temperature range that suits your solder’s melting point and the diecast alloy’s characteristics. A fine-tipped iron is ideal for precise soldering, and a variety of tips will allow you to adjust for different joint sizes and shapes. Ensure the iron has a good heat recovery time to maintain the set temperature during use. Before you start soldering, test the iron on a scrap piece of diecast or the same metal type to get a feel for the temperature and how the solder flows. This also allows you to refine your technique and prevent errors when working with the real piece. Consider a soldering station that offers multiple features, such as a digital display and various tip options, to ensure a versatile and user-friendly soldering experience.
Essential Safety Gear for Soldering
Safety should be the priority when soldering diecast metal. Always wear safety glasses to protect your eyes from solder splashes and fumes. Work in a well-ventilated area, as solder fumes can be harmful. Consider using a fume extractor to remove any potentially dangerous vapors. Wear heat-resistant gloves to protect your hands from burns. A heat-resistant mat is useful to protect your work surface from the heat of the soldering iron. When handling the soldering iron, keep it away from flammable materials. Before starting the soldering process, inspect your equipment for damage and ensure that it is in good working condition. Following these safety precautions will ensure a safe working environment and help you complete the soldering process with peace of mind.
Step-by-Step Guide to Soldering Diecast
Soldering diecast metal is a process that requires careful execution. Begin by preparing the surface. Then, apply flux and heat the metal with your soldering iron. Once the solder flows smoothly, remove the iron and allow the joint to cool undisturbed. Surface preparation is crucial. The diecast surface must be thoroughly cleaned to ensure the solder properly adheres. Use a wire brush or abrasive pad to remove any oxides, oils, or coatings. Once the surface is clean, apply flux to the area where you’ll be soldering. Flux acts as a cleaning agent, removing oxidation and promoting solder flow. Place the solder on the joint and apply heat with your soldering iron. Be patient and allow the solder to melt and flow into the joint. Once the joint has cooled and solidified, clean the area to remove flux residues. Inspect the solder joint to ensure it is solid and without defects. Following these steps precisely will help you achieve the best results.
Preparing the Diecast Surface

Surface preparation is the key to successful soldering. First, clean the diecast surface thoroughly. Use a wire brush, abrasive pad, or fine-grit sandpaper to remove oxides, dirt, and any coatings. Ensure that the surface is free from any contaminants that can prevent the solder from bonding correctly. Removing these will create a clean surface that the solder can adhere to. After cleaning, wipe the surface with a clean cloth or a suitable solvent to remove any remaining residue. Applying the flux is the next important step. The flux cleans the metal and creates an environment that allows the solder to flow and bond efficiently. Make sure the surface is clean and dry before applying flux. Proper surface preparation will lead to stronger and more durable solder joints.
Applying Flux and Soldering
After preparing the diecast surface, the application of flux is the next critical step. Flux is a chemical compound designed to clean the metal surface further. It removes any remaining oxidation and helps the solder flow correctly. Apply the flux to the area where you’ll be soldering. Once the flux is applied, the soldering begins. Place the solder on the joint and use the soldering iron to heat the metal. The soldering iron should be set to the correct temperature for the solder and diecast alloy being used. Hold the iron in place until the solder melts and flows smoothly into the joint. Ensure that the solder wets the surfaces and forms a strong bond. Avoid overheating the diecast metal, which can damage or warp it. Applying flux correctly and using proper soldering techniques leads to successful results.
Soldering Techniques for Different Diecast Parts
The soldering technique will vary depending on the shape and size of the diecast part. For small parts or intricate joints, use a fine-tipped soldering iron and thin solder. This allows for greater precision and control. When soldering larger parts, you might need a more powerful iron or a larger tip. When soldering two pieces together, ensure they fit snugly and are aligned correctly. Apply flux to both surfaces and heat them evenly to allow the solder to flow into the joint. With different diecast parts, be mindful of heat distribution to prevent warping or melting. Sometimes, using clamps or fixtures to hold the parts together while soldering is essential. Always allow the solder joint to cool undisturbed after completing the soldering process for the best results. Taking care in adjusting your technique will ensure the durability and aesthetics of your solder joints.
Post-Soldering Cleanup and Finishing

Once the solder joint has cooled, it’s essential to clean it and finish the process. Cleaning removes flux residue, which can corrode the metal over time. Use a soft brush and a suitable solvent to clean the solder joint and the surrounding area. Ensure that all flux residue is removed. After cleaning, inspect the solder joint for any imperfections, such as voids or cold solder joints. If any defects are present, you might need to rework the joint. If everything looks good, you can proceed with any necessary finishing steps. You might choose to smooth the solder joint with sandpaper or a file. This will give the joint a more polished appearance. Taking your time with the cleanup and finishing stages will enhance the appearance and durability of your soldered components.
Troubleshooting Common Soldering Issues
Several common issues can occur when soldering diecast metal, and understanding them is key to troubleshooting and improving the quality of your solder joints. One common problem is poor solder adhesion, often caused by inadequate surface preparation or the use of the wrong solder. Another common issue is cold solder joints, which occur when the metal isn’t heated adequately or the solder doesn’t flow correctly. Overheating can also be a problem, leading to the melting or warping of the diecast. If the solder doesn’t flow smoothly, check your flux and ensure it’s appropriate for the metal and that you are using the correct temperature. To improve the quality of your solder joints, always prepare the surface carefully, use the correct solder and flux, and control the temperature of your soldering iron. Identifying and addressing common issues will enhance your soldering skills.
Dealing with Poor Solder Adhesion
Poor solder adhesion is a common problem and often indicates issues with the surface preparation or the solder. If the solder doesn’t adhere to the metal, it’s probably because the surface isn’t clean. Go back to surface preparation and make sure that all oxides, oils, and other contaminants are removed. You may need to use a more aggressive cleaning method, such as abrasive pads. Another reason for poor adhesion is using the wrong type of solder or flux. Always verify that the solder and flux are suitable for the specific diecast alloy you’re working with. Insufficient heat can also lead to poor adhesion. Make sure your soldering iron is hot enough to melt the solder and create a good bond. In some cases, the diecast metal might have a coating that prevents solder adhesion. If this happens, you might need to remove the coating before soldering. Addressing these problems and re-evaluating each step will give better results.
Preventing Heat Damage to the Diecast

Preventing heat damage to the diecast is an essential aspect of successful soldering. Diecast metal is prone to melting or warping if exposed to excessive heat. One of the easiest ways to prevent heat damage is to use a temperature-controlled soldering iron, which allows you to set and maintain a specific temperature. Always set the iron to the lowest possible temperature needed to melt the solder and form a good joint. Another important technique is to avoid applying heat to the diecast for too long. Work quickly and efficiently, heating only the areas where you need to solder. Using heat sinks can help dissipate heat and prevent damage. You can use clamps or heat sinks to protect sensitive areas. If you’re working with very thin or delicate parts, consider using a lower-wattage soldering iron. Using these techniques will improve the chances of achieving successful solder joints without damaging the diecast material.
Tips for Stronger Solder Joints
Building strong solder joints is the aim. Proper preparation of the diecast surface is the key. Always ensure that the surface is clean and free from oxides or contaminants. Use the correct solder and flux, ensuring they are compatible with the diecast material. The solder should flow smoothly and wet the surfaces of the metal to create a strong bond. Apply the heat evenly and avoid overheating, which can weaken the joint. Allow the joint to cool undisturbed after soldering. Avoid moving or stressing the joint while cooling, as this can lead to cracks. Inspect the joint for any defects, such as voids or cold solder joints. If any defects are present, you might need to rework the joint. Practice and experience are vital. Over time, you’ll develop the skills and techniques needed to produce strong, reliable solder joints. These tips will help you enhance your soldering skills.